

The movie Julie and Julia is a highly entertaining and yet inspiring movie. Frustrated with her work, Julie decides to cook every recipe in Julia Child’s cookbook Mastering the Art of French Cooking and write about her experience in her blog, a task not insignificant. At the same time, the movie shows how Julia works her way up to a famous cook. One
scene demonstrates her perseverance in becoming a good cook. She keeps practicing cutting onions. She cuts so many of them that the pungent smell of onion fills the house and drives her husband to flee. Practicing scales and arpeggios for pianists is similar to the knife skills for cooks; it might seem boring, but it is a basic training that you cannot go without.
Importance of practicing scales
Playing any scales and arpeggios with the proper technique ensures easy and fluid movement without physical discomfort. Also, when you are familiar with all scales, you can quickly identify key signatures and recognize patterns while playing pieces. You’ll also find that your hands are ready for all the sharps and flats without your brain consciously reminding yourself. Additionally, you can learn chord structure through arpeggios. For example, the arpeggios of major scales teach you major chords, while those of minor scales teach you minor chords.
Practicing scales and arpeggios can also help you build finger strength and dexterity, hand flexibility, and coordination. Best of all, the stronger muscles can prevent injury. Have you ever wondered why runners do resistance training? By strengthening muscles, they can maintain better form and prevent injury. In fact, musicians are also athletes; they are athletes of fine motor skills.
Essential scales and arpeggios
Among all the scales and arpeggios, major and minor ones are a good place to start. Basically, each of the twelve notes in an octave (C, C-sharp, D, D-sharp, E, F, F-sharp, G, G-sharp, A, A-sharp, and B) can be the beginning of a scale, and the scale is named by the beginning note. The eight notes in a scale (with the first and last notes an octave apart) are either a whole or a half step apart. Those in a major scale follow this pattern: whole step, whole step, half step, whole step, whole step, whole step, half step (WWHWWWH); and those in a minor scale follow this pattern: whole step, half step, whole step, whole step, half step, whole step, and whole step (WHWWHWW). (There are other types of minor scales. This one is the natural minor scale.) Here are two examples:
C major scale: C, D, E, F, G, A, B, C
C major arpeggio: C, E, G, C
C minor scale: C, D, E-flat, F, G, A-flat, B-flat, C
C minor arpeggio: C, E-flat, G
To read more about major and minor scales, take a look at the linked articles. Or watch Michelle explain three types of minor scales and arpeggios below.
Scales and arpeggios techniques for pianists
Now that we know why we need to practice scales and arpeggios and what they are, let’s talk about how to practice them, starting with the thumb crossing technique, which allows us to navigate the keyboard with only 5 fingers (in each hand) and to connect notes without hopping from one note to another.
It’s a way of shifting position without having to pick up your hands and interrupting the sound. There are two ways in which the thumb can be crossed: the thumb goes under the other fingers or the other fingers cross over the thumb.
We use both ways to move up and down the scales. As we go up the scale, the thumb follows the 2nd and the 3rd fingers. Try to keep a natural hand position with high arch hand, and imagine you are holding a ball. This way, the thumb has room to move. As the 3rd note is played, keep a balanced weight on that 3rd finger and use it as a pivot. As the thumb swings past the 3rd finger, transfer the weight from the 3rd finger to the thumb as the rest of the fingers finish playing the scale.
Going back down on the scale, as we get to the thumb, balance the weight on the thumb and use it as the pivot this time. Swing the rest of the hand over the thumb and shift the weight from the thumb to the 3rd finger as we move into the new position and finish the scale.
For both thumb crossing methods, remember to transfer the weight from finger to finger in one fluid gesture to avoid any interruption of sound. One of the biggest pitfalls about playing these scales is collapsing the hand position during thumb crossing, which means that the palm of your hand is flat instead of arched. This produces unwanted accents.
Also, make sure your elbows are not going outwards during thumb crossing, which will disrupt the alignment of your hand and wrist as well as interrupt the flow of the music.
For the arpeggios, because of the distances between notes, the hands need to be in an open position, while the thumb tucks under or the hand swings over the thumb. Again, don’t collapse the hand position. Keep your hand in a natural position with slightly more space in between your fingerings, and tuck the thumb in at a quicker rate to cover more distance. As the thumb swings under, quickly get into the next octave with the same hand position to finish the 2nd octave.
Imagine a string is attached to your wrist to pull you along as you play these arpeggios. Your hand is in a constant motion. Keep it moving. Come back down in the same way. Draw a semicircle with your wrist from 5 to 1, and swing the 3rd finger all the way to reach G. Remember not to twist the elbow. Simply roll the thumb over to its side. Transfer the weight from thumb to the 3rd finger.
Changing articulations and rhythms
Going back to our analogy of cooking, after you successfully made a dish for the first time, you need to continue making it until you know all the steps really well and can make it without hesitation. Now that you know how to move your fingers on the keyboard, we can look at ways to improve your speed and accuracy. One of the ways to practice scales and arpeggios is to vary the articulations. Instead of playing these scales and arpeggios legato, we can play them all staccatos.

Remember to bounce from the wrist with an upward motion for staccato playing. Listen for an even tone as you play each scale and arpeggio. You can try other articulations, such as tenutos and accents.
You can also try changing the rhythms. Here are a couple of ways. One is to play dotted rhythms.

As shown above, each of these dotted rhythms is played in the long-short pattern. Keep the 16th notes short and rolling on to the next beat.

This dotted rhythm is the opposite of the previous one. It is still played in one gesture, but in the short-long pattern.
We can also alter the rhythms by grouping the notes in threes:

Or in fours:

Each group is, again, played in one gesture. The double slashes in between the groups mean to pause for a brief moment before the next group. You can also practice in groups of five notes, groups of six notes, so on and so forth.
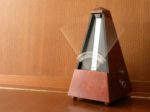
It’s also a good idea to use a metronome to vary the speed. Start with a speed at which you can play evenly and steadily and slowly work your way up. Or you can try to vary the dynamics and make the phrases musical: crescendo on an ascending scale, diminuendo on a descending scale, or vice versa.
Incorporating scales and arpeggios into practice routines
Now that we’ve talked about the whys and hows of practicing scales and arpeggios, you might ask, when? It is important to incorporate scales and arpeggios into your daily practice routine. They are great warm-ups for your fingers to get you into the “practice mode,” which keeps you more focused on what you need to work on for the practice session.
For example, spend the first 5 minutes of your practice session with some kind of scales and arpeggios. Pick only a couple to work on, for example, two easy ones whose fingerings and patterns you are comfortable with (such as C, D, E, G, and A) and one trickier one (such as F or B major) with different fingerings and patterns, or one of the scales and arpeggios that begin on the black keys (such as E-flat or D-flat).
Play through them one time legato at a moderate tempo, while paying attention to the weight transferring, keeping the elbow tucked in as the thumb tucks under and the fingers cross over the thumb, and keeping an open hand position for the arpeggios. Afterwards, you can vary the articulations and rhythms. Lastly, play the same scales and arpeggios a bit faster with more fluidity and flow.
If there are any scales and arpeggios in your repertoire, isolate those passages and use them as part of your warm-ups. These sessions can transition warm-ups nicely to repertoire.
In this article we talk about the importance, techniques, methods, and timings of practicing scales and arpeggios. Watch Michelle’s demonstration in the video for more details. Next time when you practice the piano, take some time for these fundamental skills. Or, if you are inspired, practice cutting some onions!
Raring to play the piano like a pro?
Start learning with our 30-day free trial! Try our piano courses!About Liberty Park Music
LPM is an online music school. We teach a variety of instruments and styles, including classical and jazz guitar, piano, drums, and music theory. We offer high-quality music lessons designed by accredited teachers from around the world. Our growing database of over 350 lessons come with many features—self-assessments, live chats, quizzes etc. Learn music with LPM, anytime, anywhere!


thanks for the information