

Knowing how to properly fret a note is highly important to your guitar playing journey. Use the wrong technique and you’ll end up with sore hands, buzzing notes, and possibly an injury. The good news is that fretting a note is very easy! There are really only five things you have to take note of: proper finger placement, fingertip accuracy, thumb position, curvature of the fingers, and wrist position. In this article, I outline these five issues with images so you can check in with your technique.
1. Proper Finger Placement
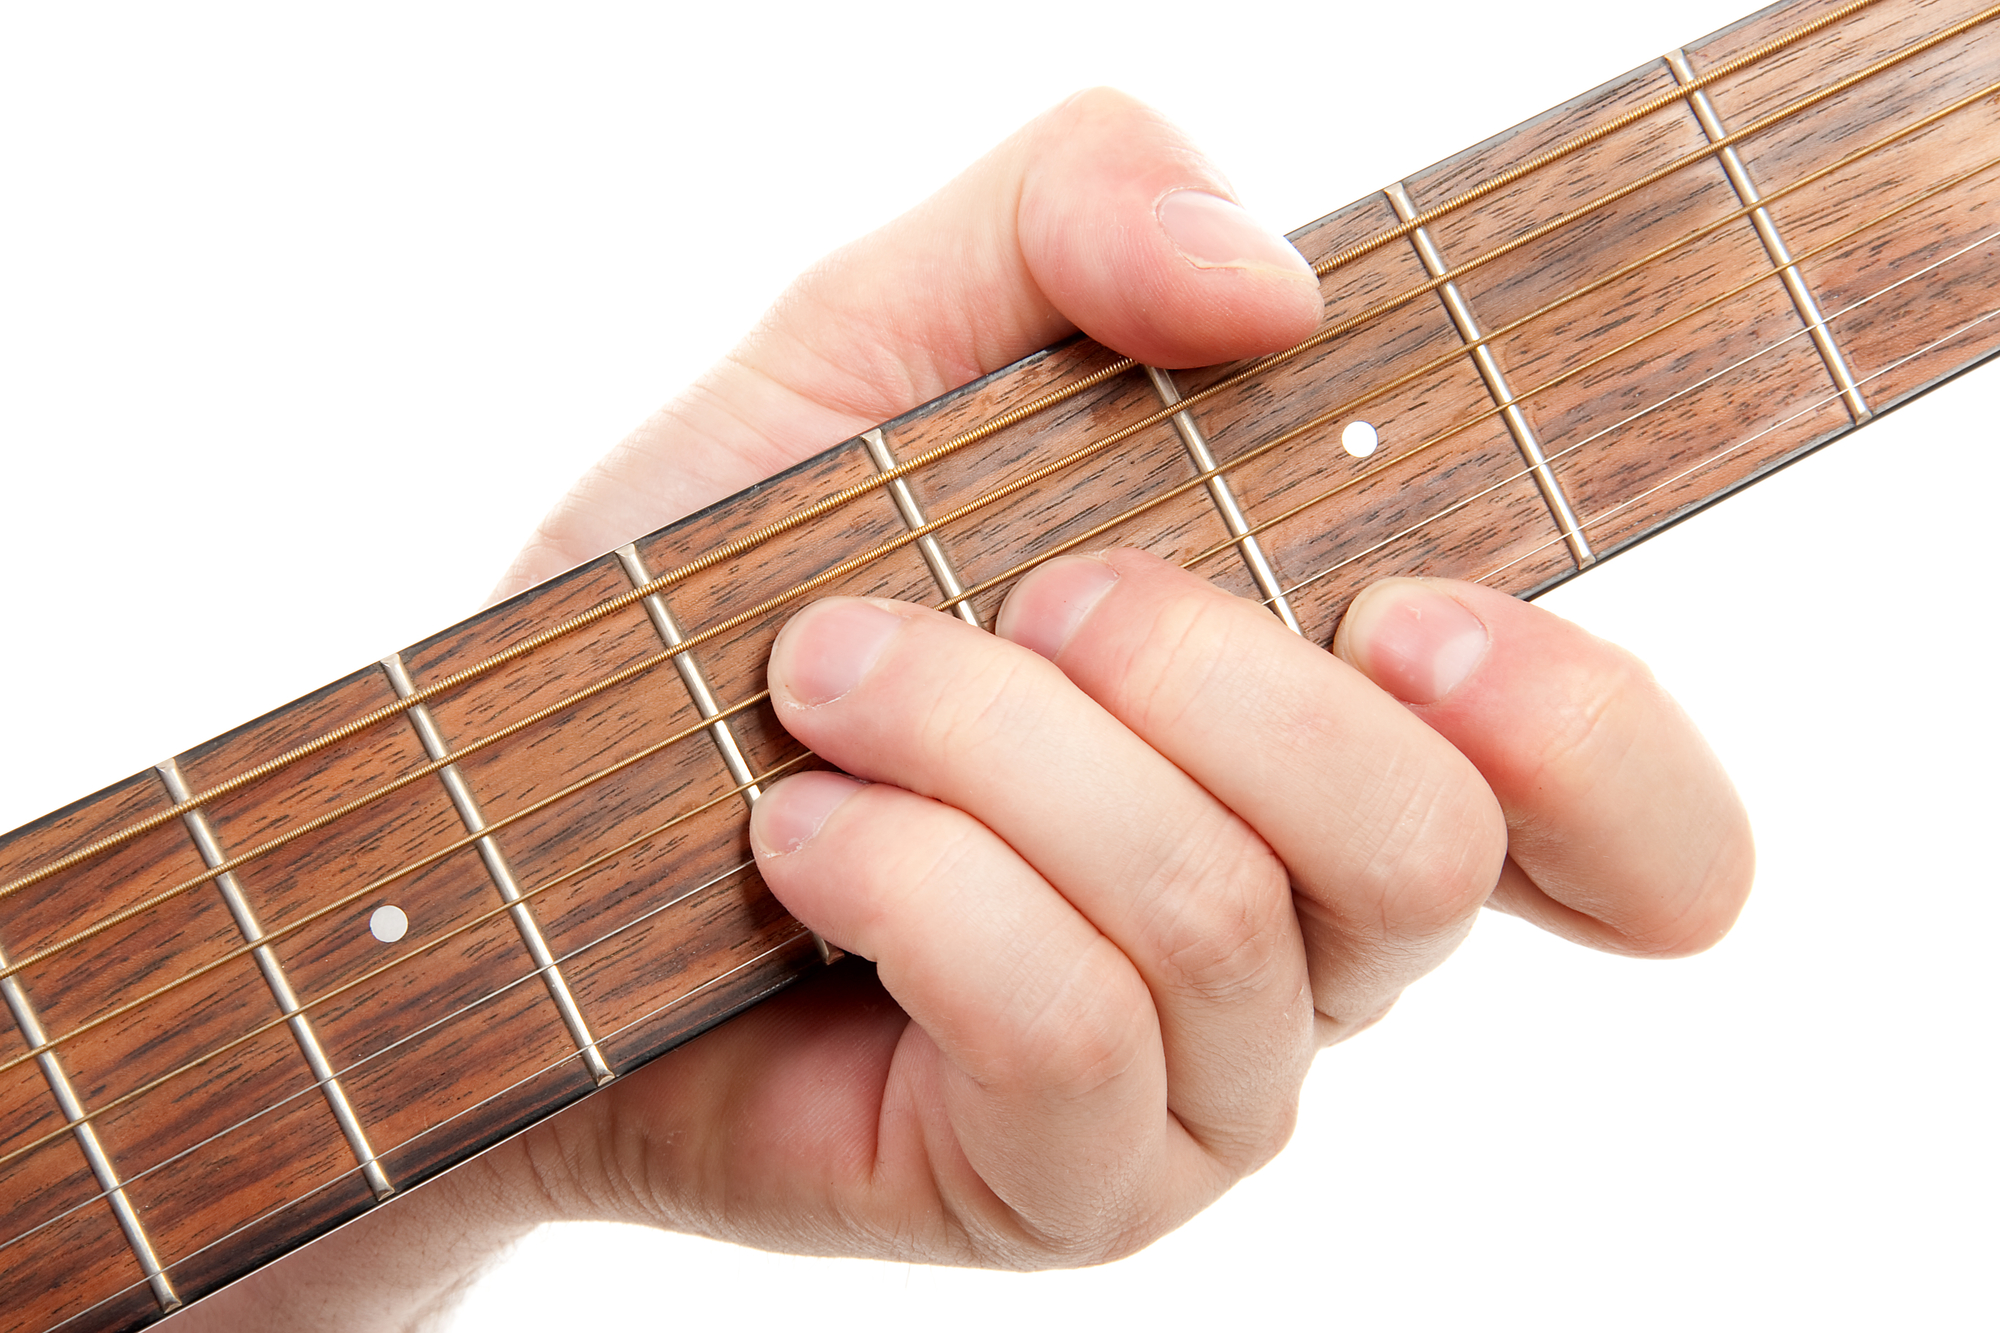
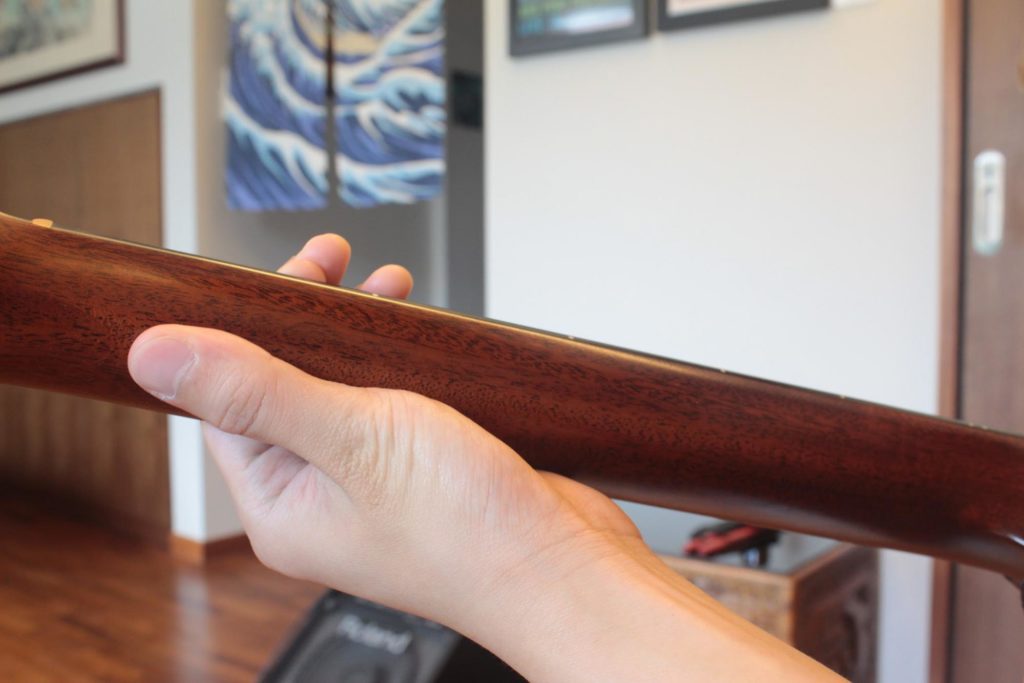
When you fret a note, keep your finger as close to the fretwire as you can. This ensures that there is a good break angle against the fret, which results in a note that rings out cleanly. Placing your finger too far away from the fret will result in buzzing or muted notes. Having your finger far away from the fret will also cause you to use more strength than is necessary to get a clean sounding note. The closer your finger is to a fret, the less effort you will need to apply to get a clean note. However, you do not want to place your finger directly on the fret as it will also cause a muted note. Always have your finger slightly behind the fret.
This finger position allows you to use minimal effort to fret the note.
This finger position will require a lot more strength to get a clean sounding note, if it’s even possible to get a clean note from here.
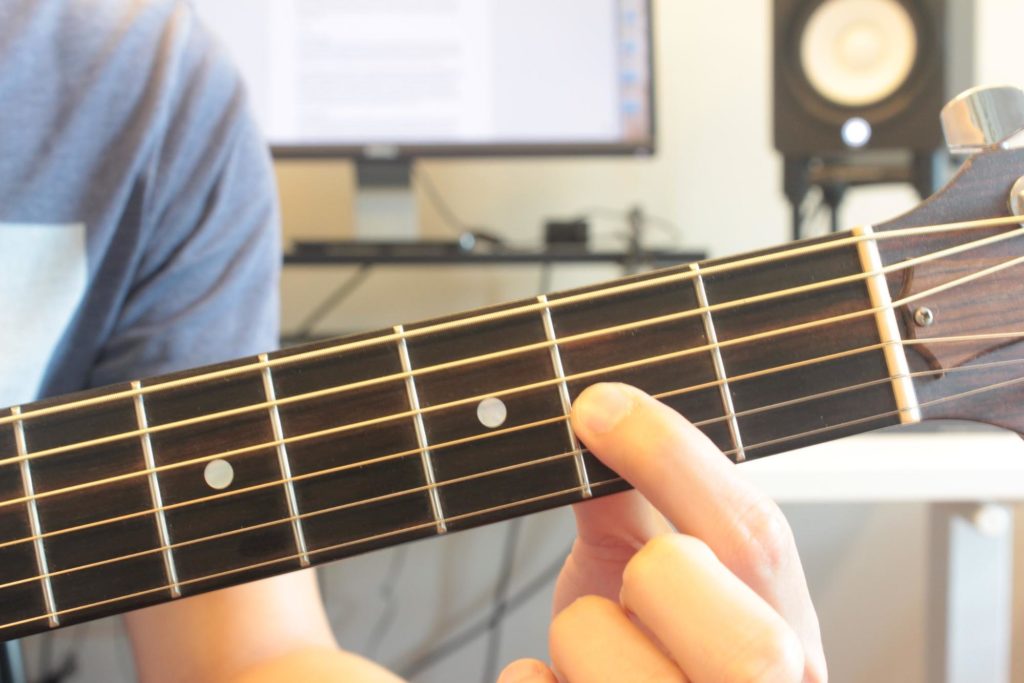
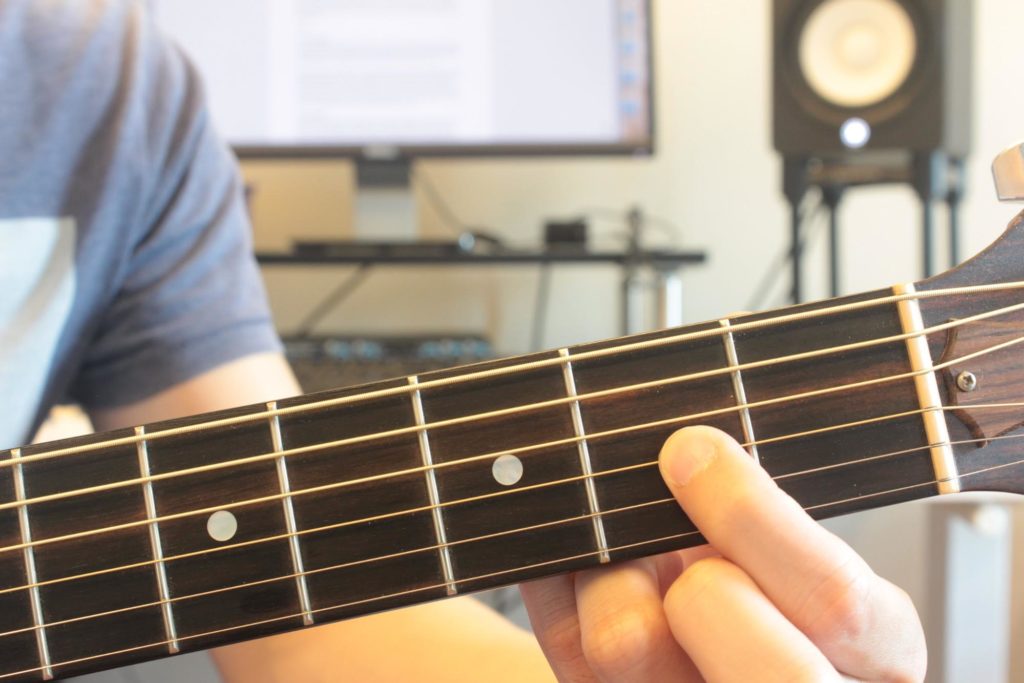
2. Fingertip Accuracy
Once you’ve gotten used to pressing down on the strings and fretting notes a little, you will notice that there is a “sweet spot” on every finger. What I mean by that is that every fingertip has a perfect area for pressing down on the strings. Whenever you land on the strings with the sweet spot, you will feel like the pressure and angle of the finger is just right.
The sweet spots for your fingertips are not necessarily right at the tips of the fingers; they are generally slightly below the tips. It is important that you notice these sweet spots early on so that when you perform your guitar exercises, you will be mindful to land on these areas. Everyone has different sized hands and fingers, so you will have to find the sweet spot for your fingertips on your own. Another thing is, the smaller the finger, the smaller the sweet spot, which naturally means that your pinky finger will have a much smaller sweet spot. This is why many beginners find it harder to use their pinkies to fret notes.
3. Thumb Position
One of the most common problems beginners will have is getting a sore thumb. Sometimes the pain isn’t just isolated to the thumb, but it spreads to the tendons in the hand, wrist, and arm. Ignoring this issue can possibly lead to a really annoying ailment called Gamer’s Thumb, or more technically known as De Quervain’s Syndrome. It can cause quite a bit of pain, so please pay attention to how your hands feel when playing guitar.
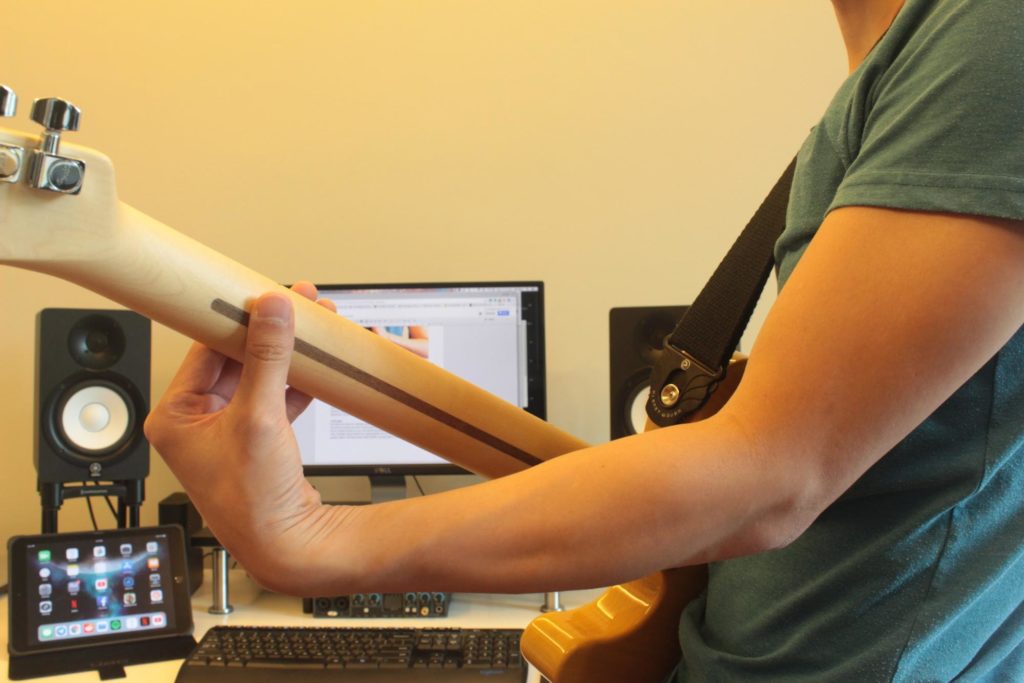
The proper placement of your thumb should be at the back of the neck, opposite your index finger. Sometimes your thumb will be around your middle finger, but that’s fine too. The key thing to remember is that your thumb should generally be pointed upwards, almost perpendicular to the neck of the guitar. Having your thumb stretched out and parallel with the neck should be avoided. This will cause too much tension in your thumb.
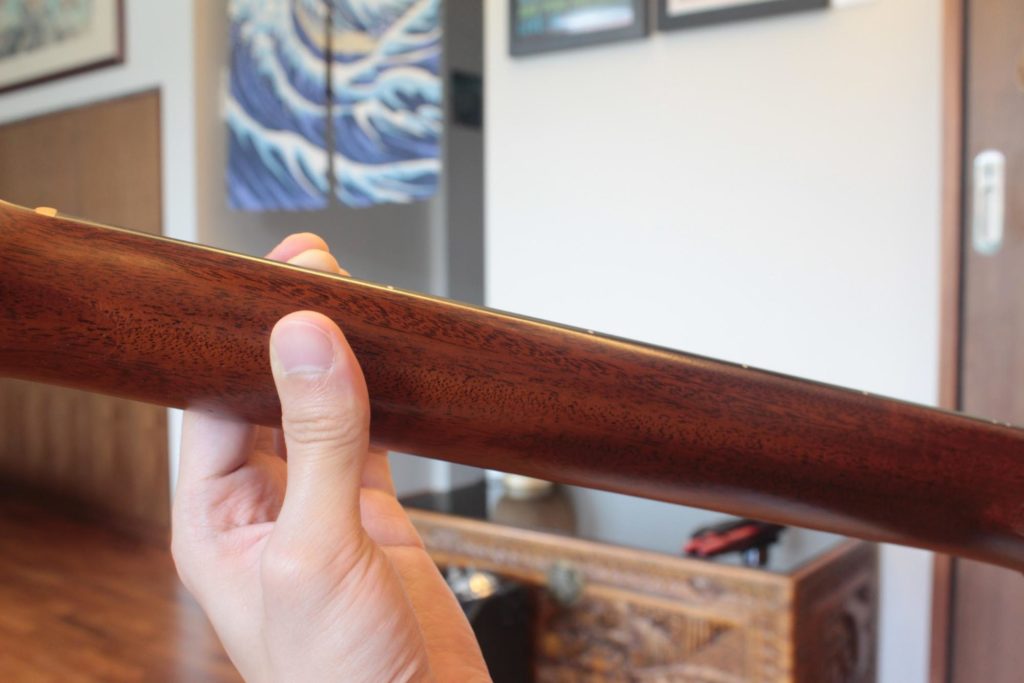
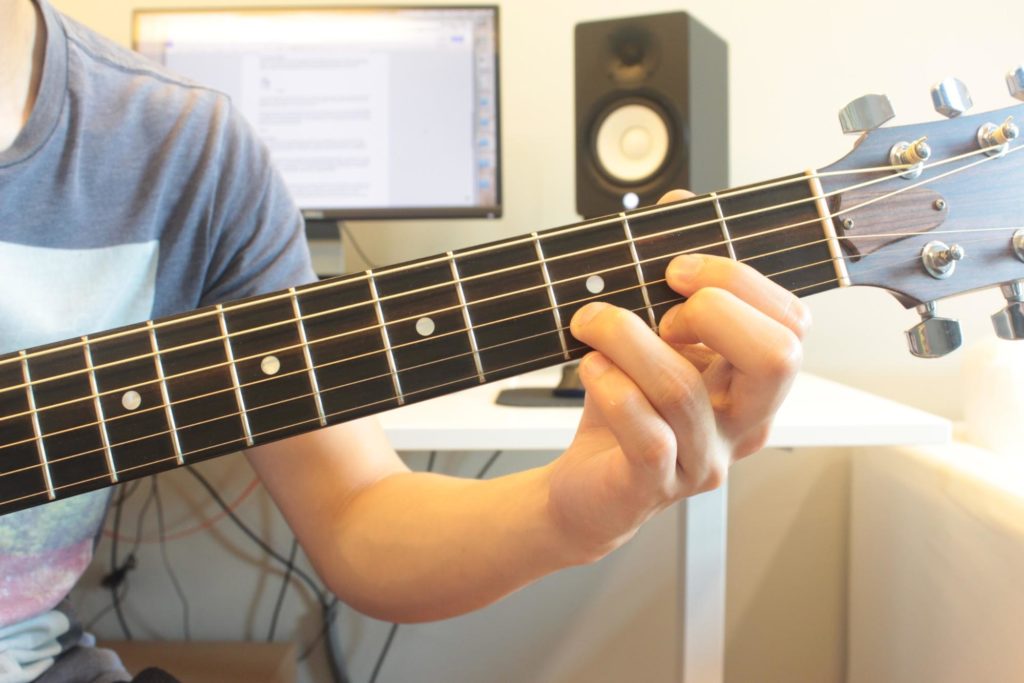
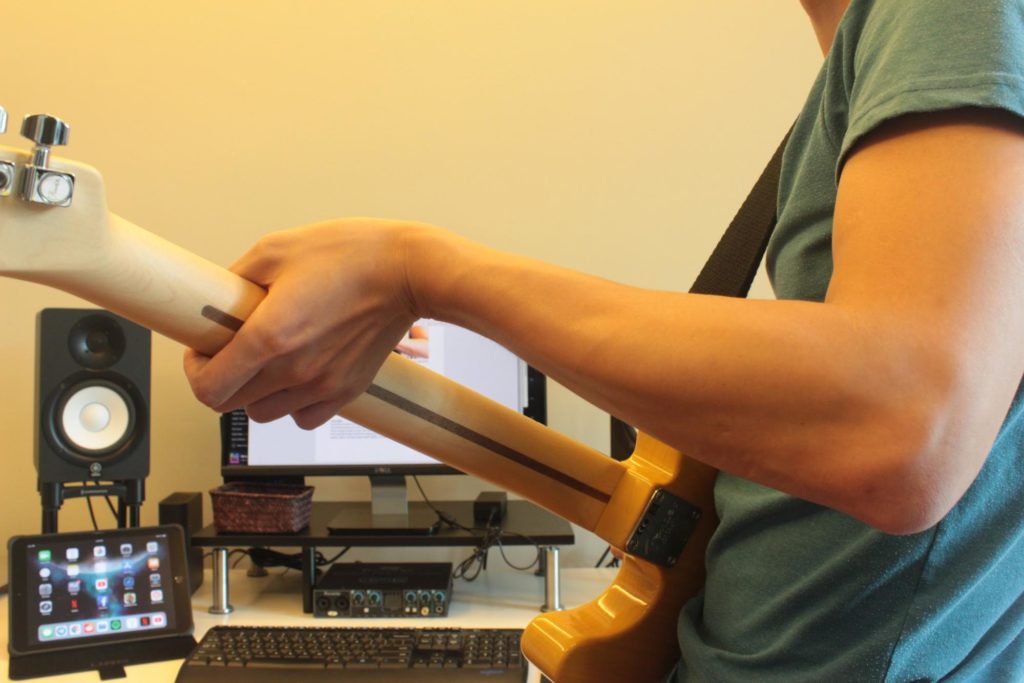
Ideal thumb position.
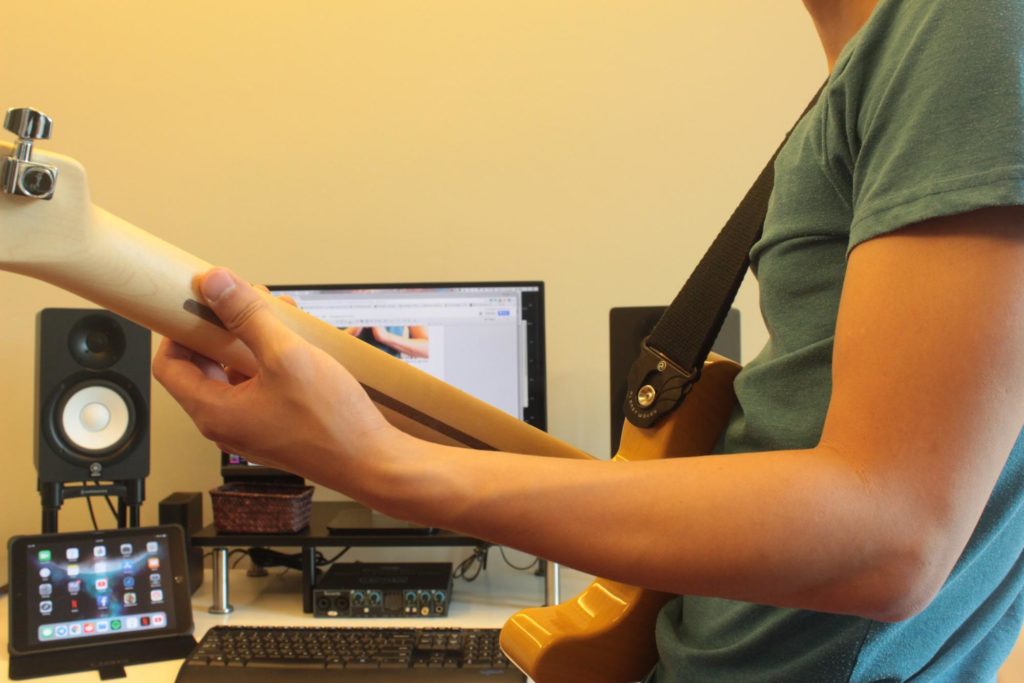
This position may cause unnecessary tension, but there are situations where you’ll want your thumb in this position.
Of course, there are exceptions to this rule, especially when you start using your thumb to fret notes. The best guideline to follow is that your thumb should very rarely experience any tension. Tension in the thumb is what causes injuries, so as long as you feel comfortable and there isn’t any tightness, you will be fine.
4. Curvature of the Fingers
Whenever you fret your notes, especially when fretting chords, you will need to curve your fingers. This helps you avoid accidentally touching the other strings. A good example of this being a problem among beginners can be demonstrated with the D major chord.

Notice the curvature of my fingers.
Often, beginners will find that their ring finger is blocking the note on the first string from ringing out. The remedy for this is to bend your ring finger a little more at the first joint. This will allow the first string to have the space to ring out.
Here is a cool trick I learned recently to get an idea of how much to curve your fingers: begin by creating a fist with your right hand, then wrap your left hand around the fist (the other way around if you’re a left-handed player). This should give you a rough idea of what your fingers should look like when fretting notes.
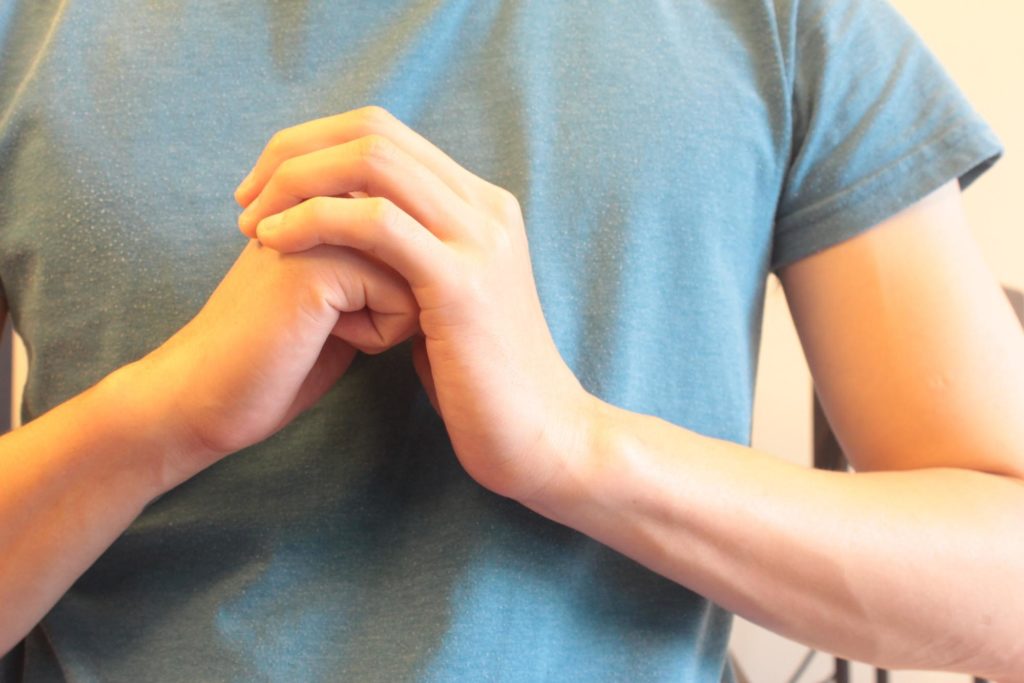
Notice how the first joints of my left-hand fingers are right over the knuckles of my right hand.
5. Wrist Position
Another really common complaint from many beginners is a sore wrist. This is another one of those things you really want to watch out for, as sore wrists can eventually lead to carpal tunnel syndrome. It’s painful, annoying, and hard to get rid of, so please be aware of this.
It is very important that for the majority of the time while playing guitar, your wrist is in a nice and relaxed position. It should not be overly stretched forward or backwards. For most situations, your wrist should be slightly bent forward. It should feel like your wrist is in a resting state, rather than an extended state.
As long as your wrist feels relaxed the majority of the time, and it doesn’t hurt after you’re done playing, you should be in good shape. If however, you do find that your wrist does hurt during or after playing, you will need to spend some time being mindful of your wrist placement. Generally, a simple awareness of tension in the wrist will get rid of the issue.
Natural and relaxed wrist position. Keep your wrist in this position as often as possible.
These two images show an overextended wrist. Some chords may require you to have your wrist in one of these positions, but keep these to a minimum.
Let’s Play!
And that’s all there is to fretting notes. It really is one of the easiest aspects of playing guitar and almost anyone can pick up the proper technique within a day. Just remember to watch out for excess tension so you can avoid long-lasting injuries. I know it sounds silly that it’s even possible to get injured from playing guitar, but it’s a lot more common than many people realize. So keep those hands healthy, and get back to practicing!
Improve your guitar playing with more articles like this!
Free monthly guitar tips and advice delivered straight to your inbox!
About the Author: Ze

Ze first began his journey playing original music and top 40s pop tunes around the country's popular venues. Eventually, through the music of John Mayer, he found a strong attraction to blues music. Ze has years of experience teaching beginners and intermediate guitarists. Currently with Liberty Park Music he is teaching Introduction to Guitar Playing for Complete Beginners, Rhythm Guitar to learn about strumming, chords and more, Guitar Essentials as a fast-track review course, and lots of Song Lessons on pop and rock hits.


thank you libertyparkmusic for giving me wonderful information