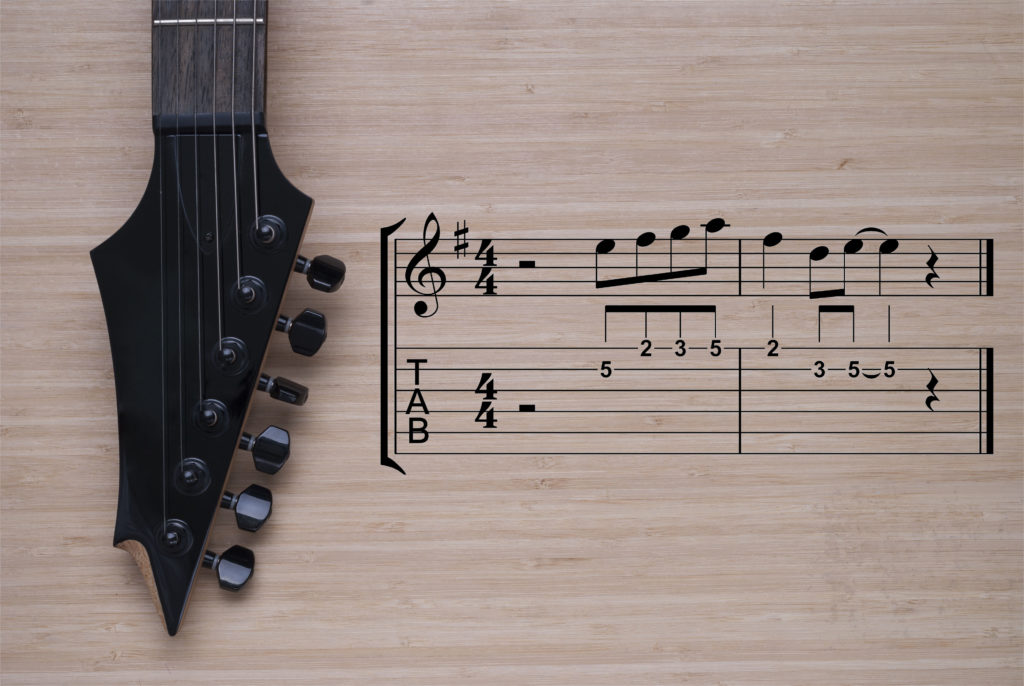
Learning how to read guitar TABs is an important tool that makes it easier for beginning guitar players to learn how to play. Thankfully, guitar TABs are also the easiest method of notating music for guitar.
Since most guitars are six-string guitars, we’ll look at tabs applicable to six-strings. For guitars with seven strings or more, it’s similar, but the tabs have additional lines.
Strings and Tunings
Before we look at tabs, we first need to properly identify the number and tuning of each string on the guitar.
The first string is the thinnest string on the guitar, and the sixth string is the thickest string. Starting from the sixth string, the strings are tuned E-A-D-G-B-e.
A mnemonic device I use to remember the standard tuning is “Every Animal Does Good Behavior Exercises.”
The TAB
e |----------------------------------------------|
B |----------------------------------------------|
G |----------------------------------------------|
D |----------------------------------------------|
A |----------------------------------------------|
E |----------------------------------------------|
This is what a simple blank tab looks like. There are variations here and there on different websites, but the variations are mostly just aesthetic.
Notice how there are six lines that run across? Each line represents a string on your guitar, and on the left, you’ll see the notes that these strings are tuned to.
Take note that the first string on the guitar (thinnest string) is represented on the first line of the TAB, and the sixth string (thickest string) is the last line of the TAB. This is something many beginners get confused with.
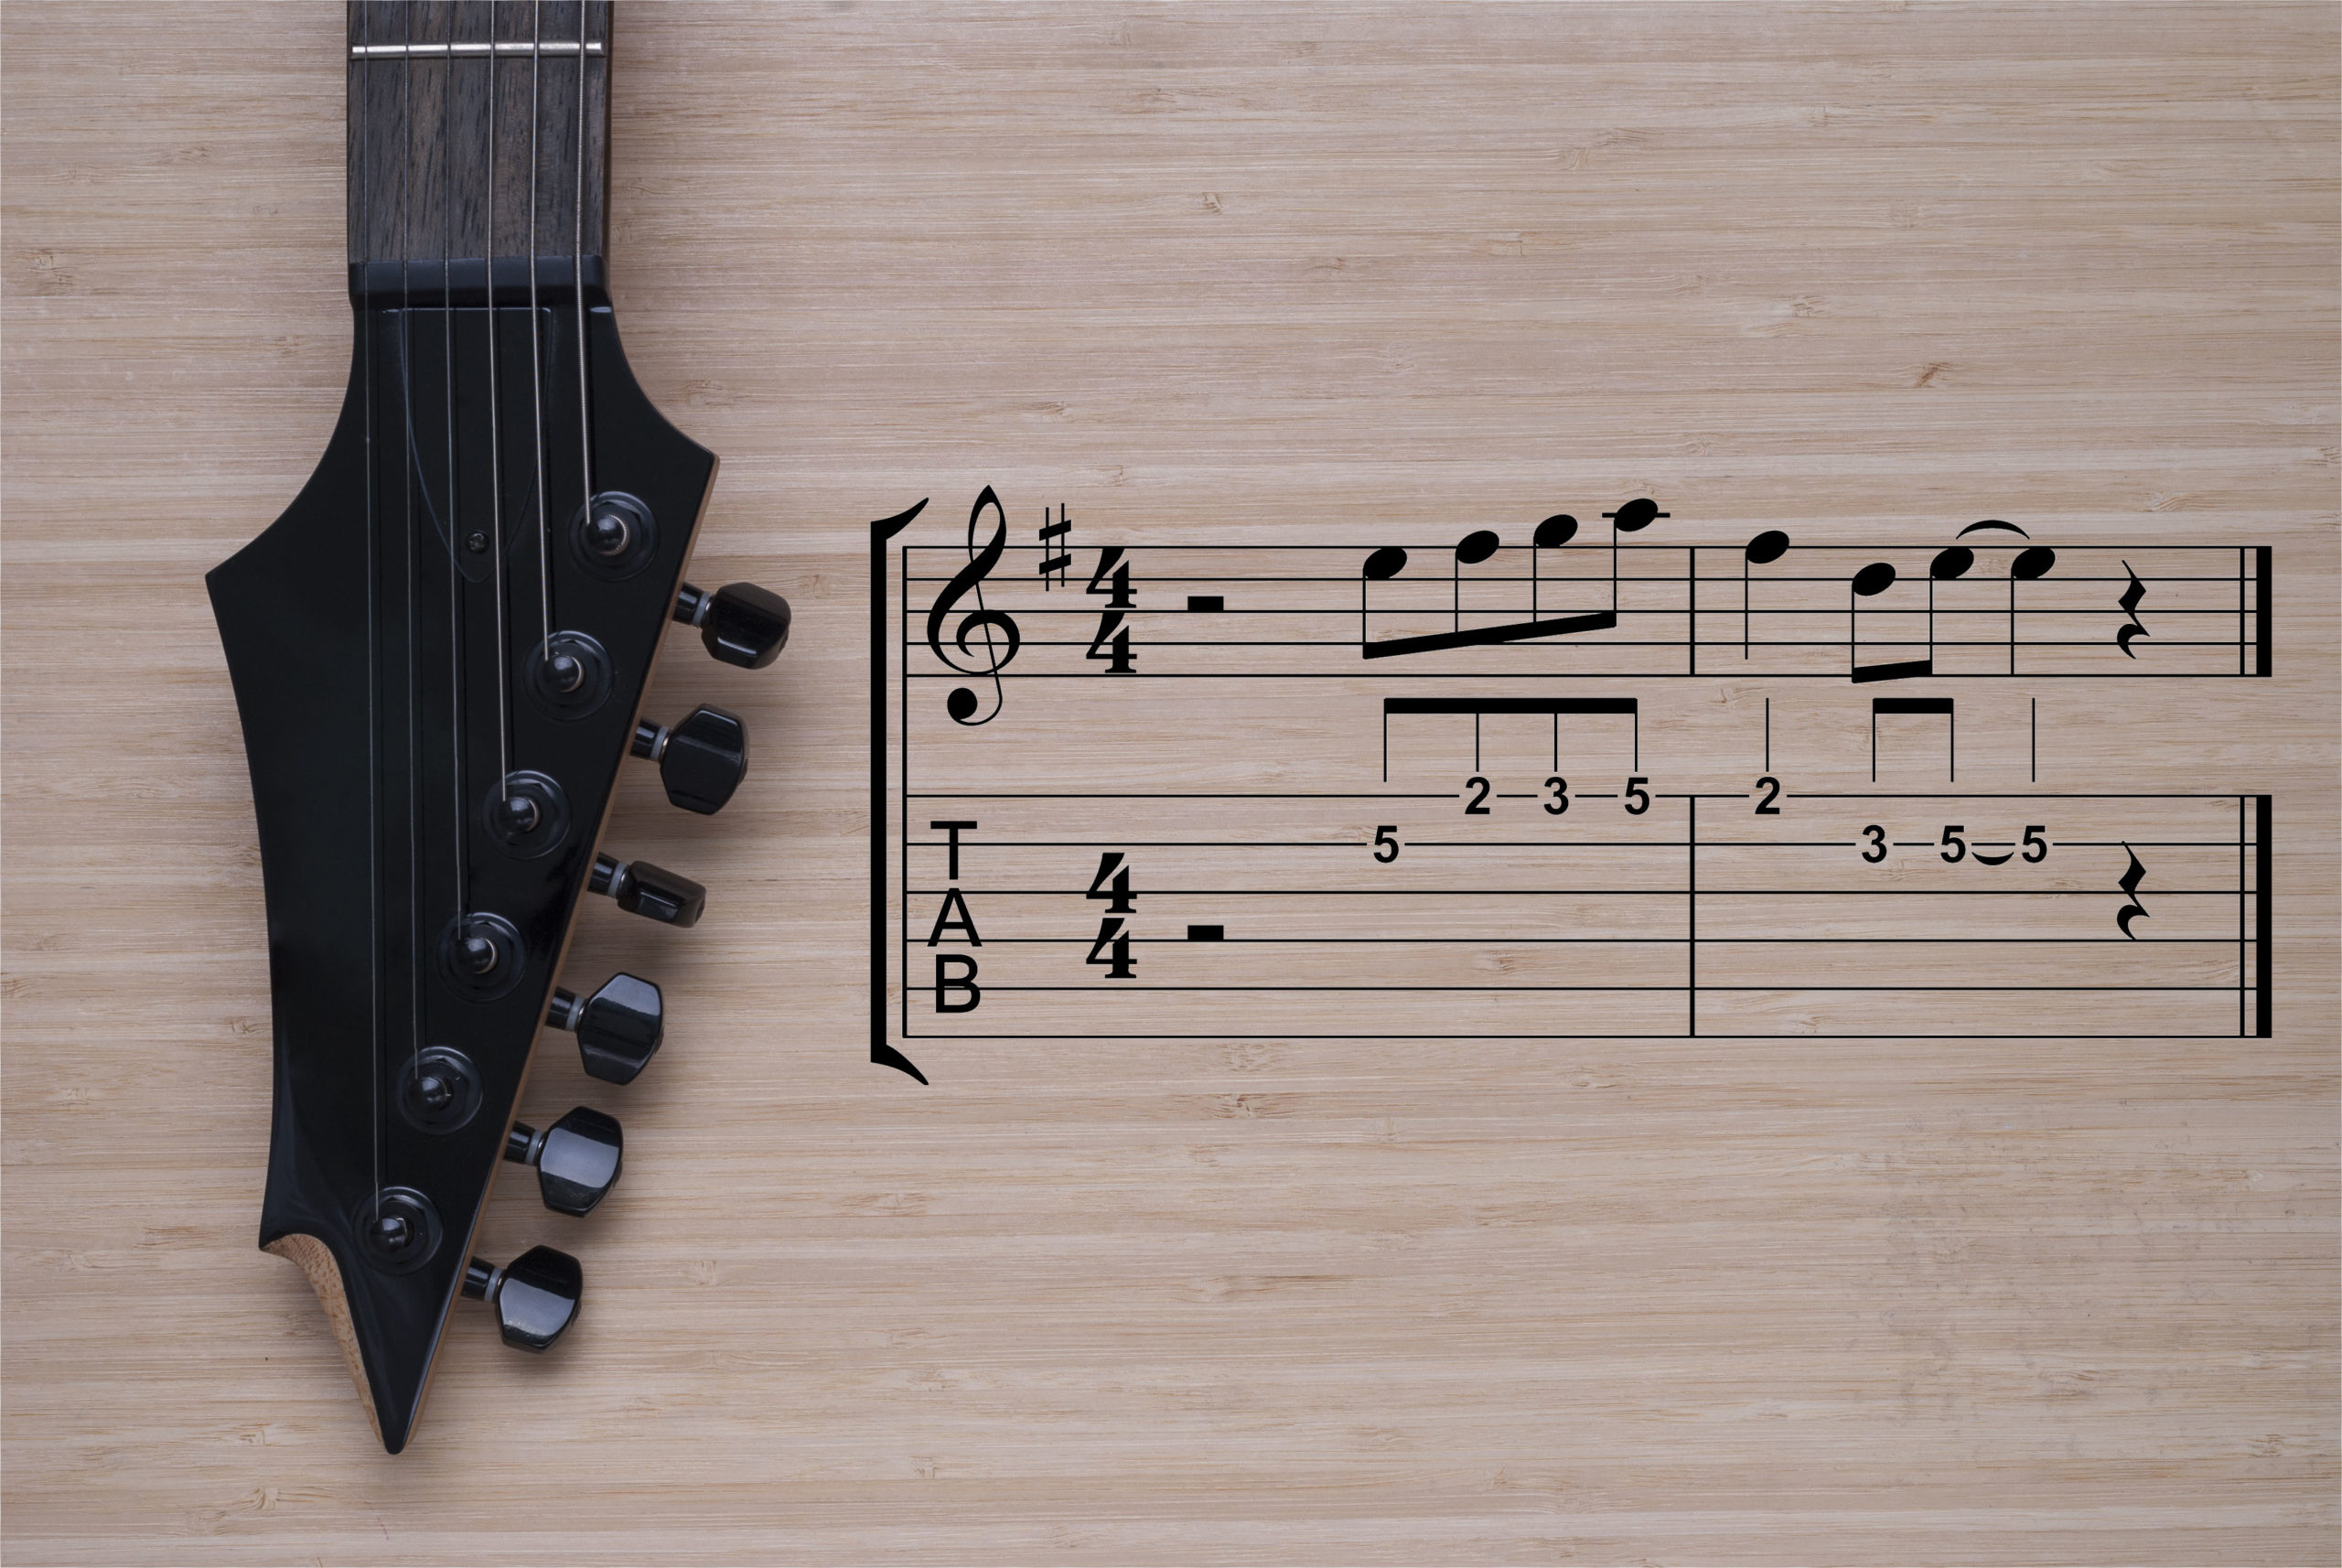
There are also professional TABs that come with accompanying standard notation. The great thing about having standard notation displayed above your TABs is standard notation will give you rhythm notations as well. Most simple TABs do not have rhythm notations which means that you’ll have to be very familiar with the rhythm of the notes before reading the TABs. For our purposes, we’ll be using professional TABs.

Here is what a blank professional TAB looks like. Notice that there is a staff with a treble clef above for standard notation and the TABs are below. Also notice that the tuning of the strings are not displayed beside the TAB. This usually means that the song will be using the standard EADGBe tuning.
If the song uses alternate tunings like Drop D, the new tuning will be notated either beside the strings or at the beginning of the music sheet.
Drop D tuning in simple TABs
e |----------------------------------------------|
B |----------------------------------------------|
G |----------------------------------------------|
D |----------------------------------------------|
A |----------------------------------------------|
D |----------------------------------------------|
Professional TABs with Drop D tuning

What do the Numbers Mean?
Obviously, a tab sheet for a song is going to have more than just blank lines, so let me start by explaining the numbers first, then we’ll get into the other symbols.

The numbers represent which fret of that particular string needs to be played. 0 means open string, 1 means first fret, 2 means second fret, and so on. Also, tabs are read from left to right.
So in the example above, you’ll start by playing the open G string (3rd string) twice, then the note on the second fret, then the open string again. Then we’ll move on to the first fret of the B string (second string), then the open B string.
Try playing the entire example above, and see whether you recognize the song!
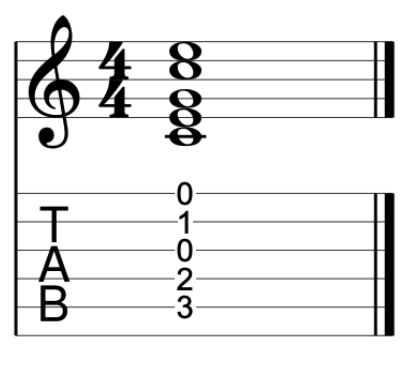
Sometimes you’ll see an example like the one above, where the notes are stacked on top of each other. This is the way chords are written in tabs. Simply play all those notes at once, and you’ll find that the example above produces a C major chord.
Stranger Things
So we’ve dealt with the numbers, now let’s look at some of the stranger symbols that you may find in tabs. There are dozens of symbols used throughout guitar TABs, but we’ll just be focusing on those that are applicable for beginners. All of these symbols are notating guitar-specific techniques to be used to play the notes. Of course, this means that you’ll need to know how to execute these techniques. Be sure to check out our website for some technique lessons!
Slides
So we’ve dealt with the numbers, now let’s look at some of the stranger symbols that you may find in tabs. There are dozens of symbols used throughout guitar TABs, but we’ll just be focusing on those that are applicable for beginners. All of these symbols are notating guitar-specific techniques to be used to play the notes. Of course, this means that you’ll need to know how to execute these techniques. Be sure to check out our website for some technique lessons!
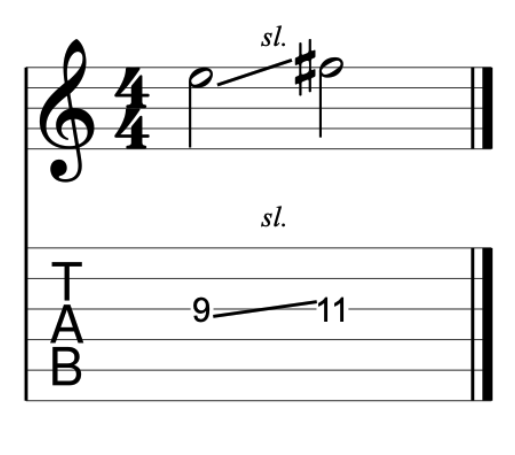
In the example below, you’ll be using a slide technique to get to the 11th fret. Start by picking the note on the 9th fret, then slide up to the 11th fret while maintaining the pressure on the string.
Hammer-Ons and Pull-Offs
In this example, you will play the note on the 9th fret, then use a hammer-on technique to play the note on the 11th fret.
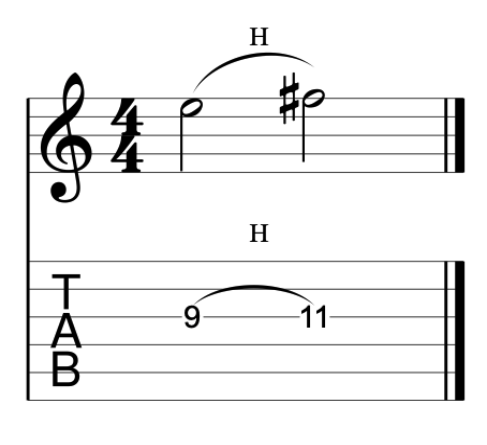
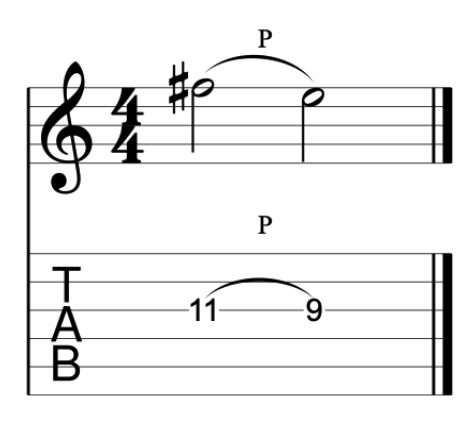
In contrast, for the example below you'll play the note on the 11th fret, then use a pull-off technique to play the note on the 9th fret.
String Bends
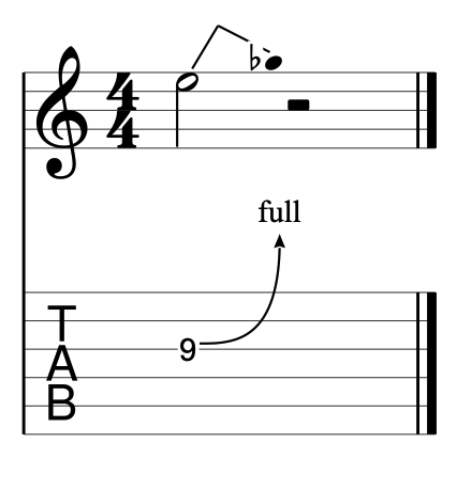
For this example, you will pick the note on the 9th fret, then bend the string so that the note is now a whole-step higher in pitch.
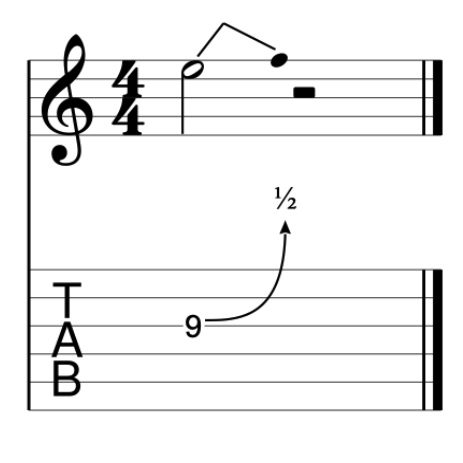
The example below is similar to the previous example where you have to use a bend technique, but this time instead of bending a whole-step up, you’ll just have to bend a half-step up in pitch.
Palm Mute
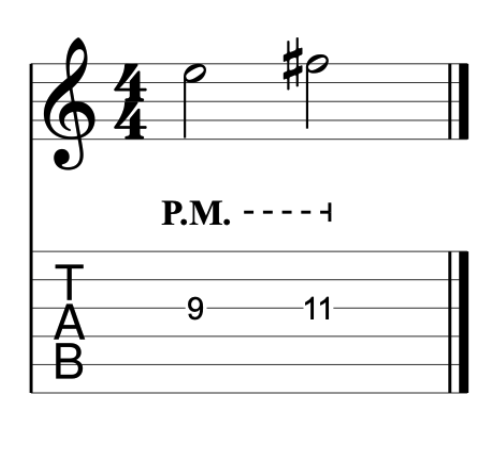
In this example, the “P.M.” symbol is notating a palm mute technique. Play the two notes using a palm mute.
Vibrato
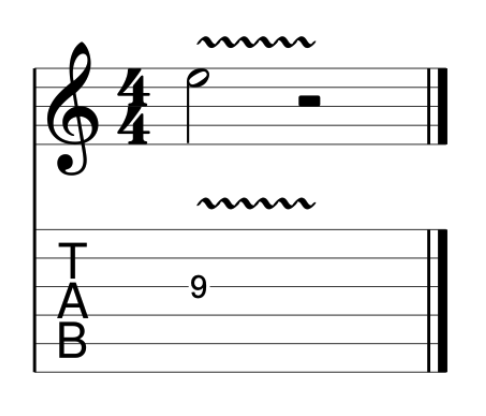
This final example is notating a vibrato technique that should be employed when playing the note on the 9th fret.
There are many additional symbols used to notate guitar techniques in TABs, however, as a beginner, you shouldn’t get too lost in these symbols yet. Spend more time learning songs that don’t require too many ornamentation techniques.
Start Easy for Beginners
For beginners, I suggest learning these simple songs:
- “Jingle Bells”
- “Happy Birthday”
- “Amazing Grace”
- “Silent Night”
- “Chasing Cars” - Snow Patrol
- “I Walk the Line” - Johnny Cash
- “The Godfather Theme” Song
- “Come As You Are” - Nirvana
- “Hurt” - Johnny Cash
- “Wish You Were Here” - Pink Floyd
Patience, Grasshopper...
Reading guitar tabs is very similar to learning how to read in a new language. Your progress will be relatively slow in the beginning, but if you keep it up, you’ll only get faster over time. This does require quite a bit of patience, so have faith that you’ll improve. Before you know it, you’ll be reading tabs like a pro!
One really important point to make is that you always want to pick songs that are within your level. If you decide to learn a song that is too difficult, you will become frustrated very easily, and that may lead to you giving up on the guitar altogether. Always pick a song that is within your skill range in order to keep yourself motivated and constantly improving. Even the pros had to learn to crawl before walking.
Final Note
That’s it for how to read guitar tabs.
Some of you may be wondering at this point, “Well, I know these symbols stand for certain techniques, but how do I actually perform them?”
All of this information can be found at Liberty Park Music’s Guitar Essentials program. As always, remember to keep it fun!
About the Author: Ze
Ze first began his journey playing original music and top 40s pop tunes around the country's popular venues. Eventually, through the music of John Mayer, he found a strong attraction to blues music. Ze has years of experience teaching beginners and intermediate guitarists. Currently with Liberty Park Music he is teaching Introduction to Guitar Playing for Complete Beginners, Rhythm Guitar to learn about strumming, chords and more, Guitar Essentials as a fast-track review course, and lots of Song Lessons on pop and rock hits.



Thank you for the easy to understand explanations, they cleared up a few questions for me 🙂